Table of Contents
ClickLeadz allows you to automatically send a private rejection message to members you decline — helping you stay polite, professional, and clear about your group criteria.
Before You Begin #
Make sure:
- You’ve added your Facebook group to ClickLeadz
- You have the Chrome extension installed
- You are logged into ClickLeadz while using Facebook
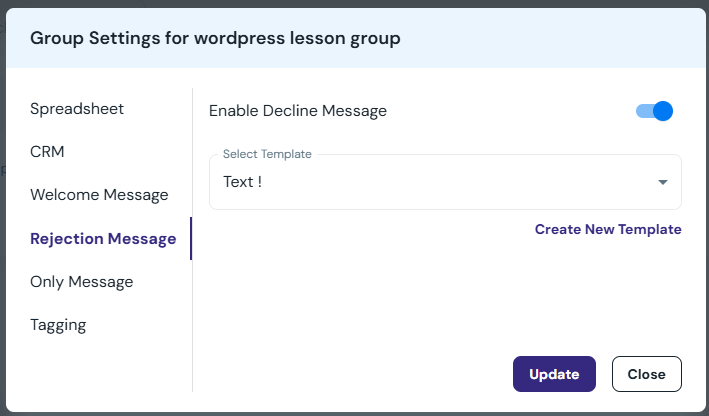
Step 1 — Enable the Rejection Message Feature #
- Open the ClickLeadz Web App
- Click the Settings (⚙️) icon beside your group
- Select the Rejection Message tab
- Toggle Enable Rejection Message ON
A template box will appear.
Step 2 — Add or Edit Your Rejection Message #
You can:
- Select an existing template
OR - Click Create New Template to write one
Example message:
Thanks for your request to join the group.
At the moment we’re only accepting members who meet certain criteria.
You’re welcome to reapply later!
Click Update to save your changes.
Step 3 — Decline With Message #
Go to:
Facebook → Group → Member Requests
With the ClickLeadz extension running, you’ll see:
- Decline
- Decline & Send Message (appears when enabled)
Click:
Decline & Send Message #
→ The member is declined
→ Your message is sent instantly to them


