#
ClickLeadz helps you collect, organize, and export new member information from your Facebook groups — turning your group activity into high-quality leads automatically.
Follow these steps to start generating leads inside ClickLeadz.
Step 1 — Add Your Facebook Group to ClickLeadz #
Before capturing leads, you need to connect your Facebook group to the ClickLeadz web app.
- Log in to your ClickLeadz Web App
Go to the ClickLeadz dashboard and sign in using your registered email or Facebook account. - Open Your Facebook Account
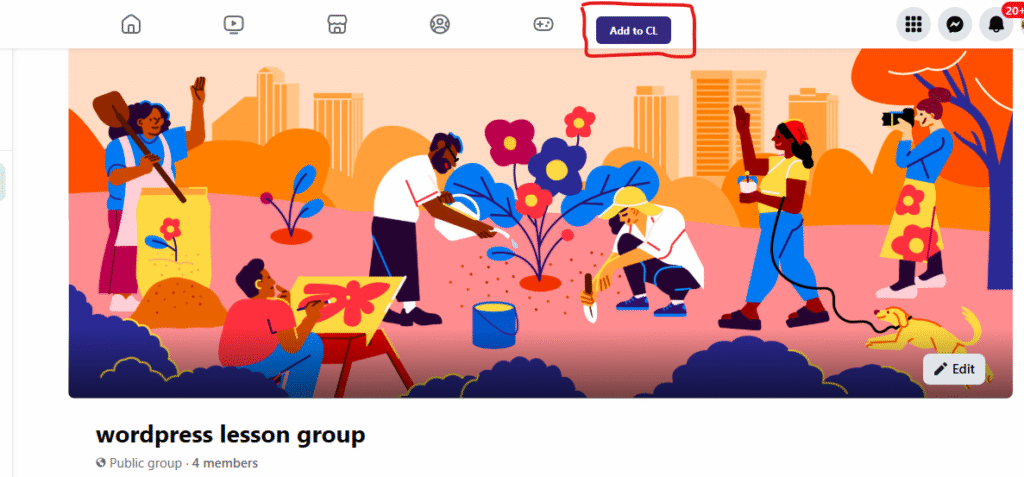
In a new browser tab, log in to Facebook and navigate to the group where you’re an admin. - Click the “Add to CL” Button
On your Facebook group page, locate the ClickLeadz icon bar at the top.
Click the “Add to CL” button to connect your group to your ClickLeadz account. - Confirm Group Connection
After adding, go back to the ClickLeadz web app — your connected group should now appear in your dashboard.
2. Create a Spreadsheet for Your ClickLeadz Group #
Once your Facebook group is connected to ClickLeadz, the next step is to create a spreadsheet where your leads will be stored automatically.
Follow these steps to set up your export sheet:
1 — Go to Group Settings #
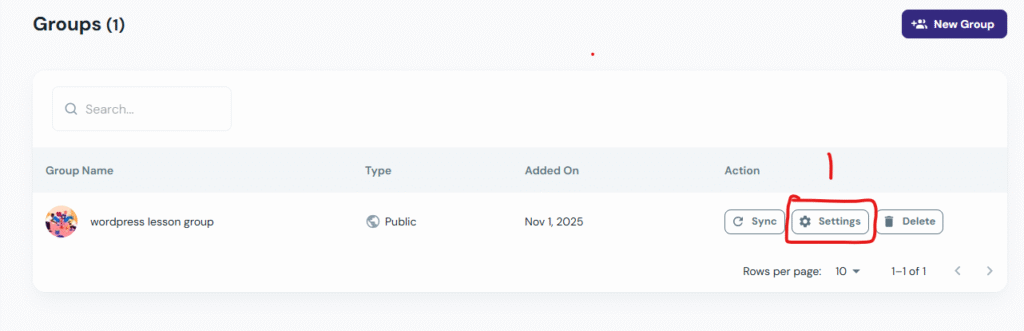
- From your ClickLeadz dashboard, locate your group under the Groups tab.
- Click the Settings ⚙️ button beside your group name.
(You’ll see this button next to “Sync” and “Delete,” as shown in the image.)
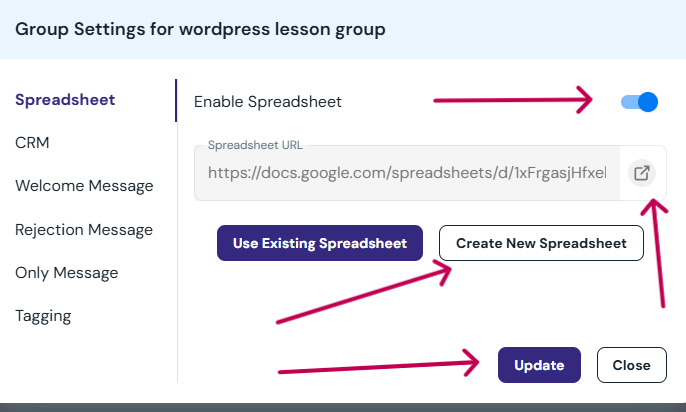
2 — Enable Spreadsheet Integration #
- Inside the group’s Settings panel, locate the Google Sheet integration toggle.
- Turn the toggle ON to enable sheet connection for this group.
3 — Create a New Spreadsheet #
- Click the Create New Spreadsheet button.
- A new Google Sheet will be generated automatically and linked to your group.
- Once created, you’ll see a spreadsheet link appear in the settings.
4 — Save and Open Your Spreadsheet #
- Click Update to save your settings.
- To access your new sheet, click the Open Sheet icon next to the spreadsheet link.
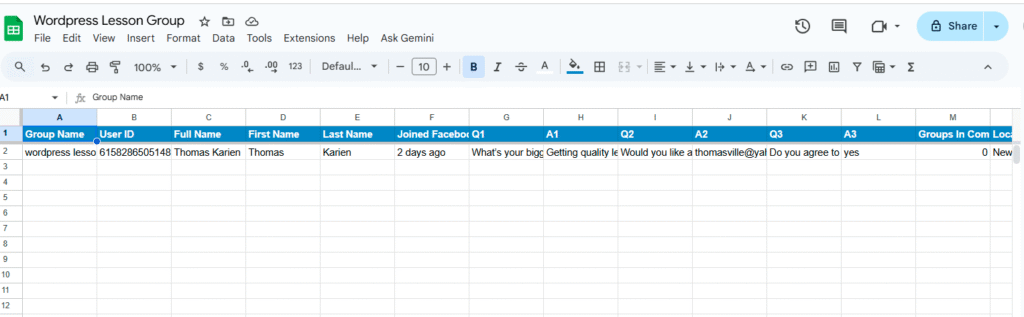
- Don’t forget to rename your spreadsheet (for example: “WordPress Lesson Group Leads”) so it’s easier to find later.
Step 3 — Capture Member Requests Automatically #
Once your Facebook group is connected to ClickLeadz and your spreadsheet is set up, you’re ready to start collecting leads from incoming member requests.
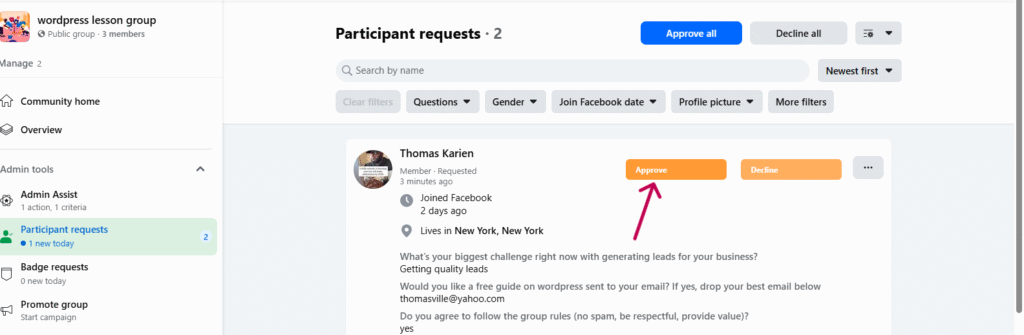
1 — Open Your Facebook Group’s Member Requests Page #
- Go to your Facebook group where you’re an admin.
- In the left sidebar, click Participant Requests under the Admin Tools section.
(This is where all new join requests appear, along with their answers to your group questions.)
2 — View ClickLeadz Action Buttons #
When your ClickLeadz extension is active, you’ll notice ClickLeadz buttons appear on each member request:
- Approve
- Decline
- Custom Approve All (visible when multiple requests exist)
- Custom Decline All
These buttons are only shown for groups that are already connected to your ClickLeadz web app.
💡 If you don’t see the buttons, ensure your group is added to ClickLeadz and your web app session is active.
3 — Capture Leads Automatically #
Each time you approve or decline a member using the ClickLeadz buttons:
- The member’s name, profile link, and answers to group questions are automatically saved to your connected spreadsheet.
- Their details also appear inside your ClickLeadz dashboard for easy tracking.
- If tagging or auto-messaging features are enabled, they’ll also trigger instantly—no need to refresh the page.
That’s it!
ClickLeadz now captures every lead in real-time whenever you process a member request—keeping your Facebook group growth fully automated and organized.


